Monday, October 30, 2006

Seat Belts - 0.5 hours (459 Total)

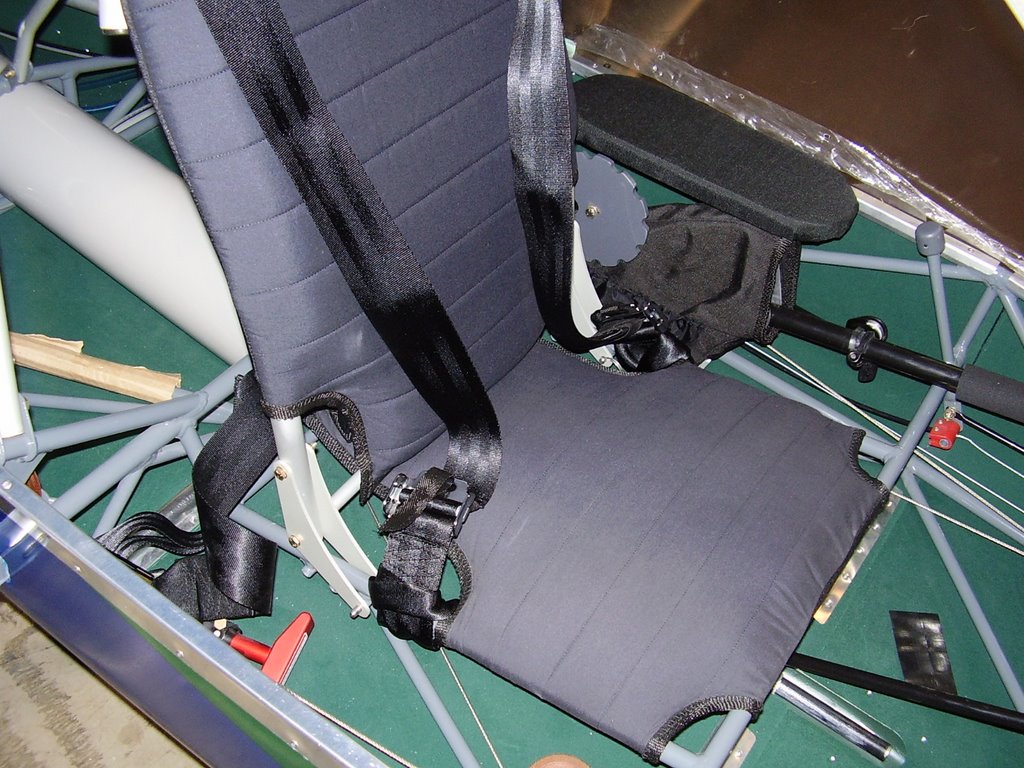
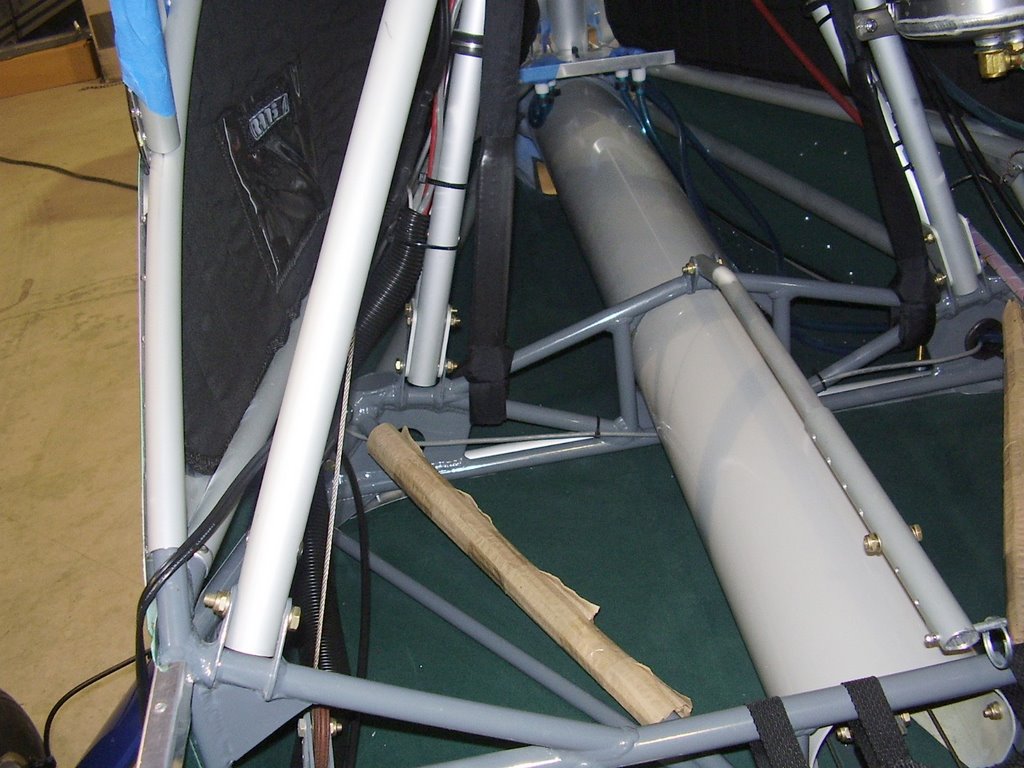
The seat belts in the S-14 seam to have been an after thought. The lap belts, which I installed a while ago interfere with the flap mechanism. To alleviate this, I wrapped the left portion of the lap belt through the steal frame of the plane. This effectively shortens the length of the left lap belt but keeps it from rubbing on the flap mechanism.

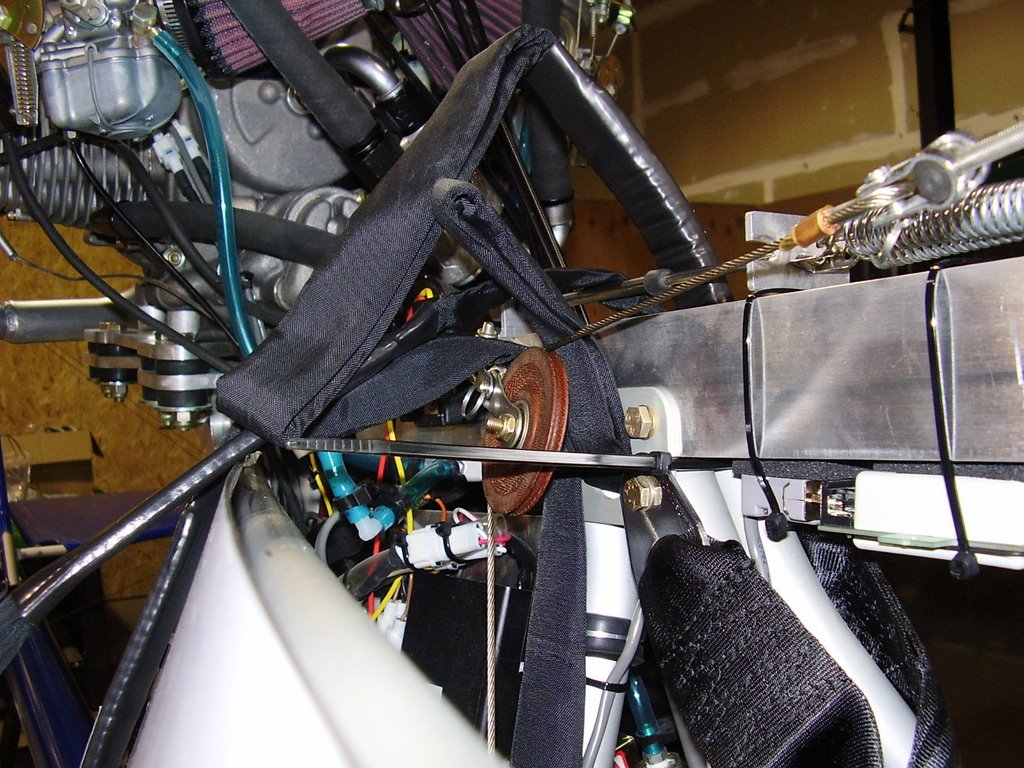
The shoulder straps, which I installed today, also has issues. The shoulder straps are securely bolted to the keel tube but are only connected to the lap belt on the bottom. The shoulder straps are made with loops at the bottom for lap belt to go through. When the shoulder straps are toughened, the lap belt rides up, taking the grip off of my hips and places it on my stomach. The removal of the pressure on my hips make me feel un-secure and the pressure on my stomach is uncomfortable.

So instead of wrapping the loops of the shoulder straps around the lap belt, I looped them around the framework of the seat. This allows me to securely tighten the lap belt and securely tighten the shoulder straps. The shoulder straps are easy to get in and out of in this position. They may be a little too easy to get out of but they due seems to hold me in place.

Radio Antenna - 1 hour (458.5 Total)

Today I received the extension cable I will use for my radio antenna.

Because of where I have mounted my radio, the rubber duck antenna is touching the windshield. This SMA cable will allow me to mount the antenna down near my feet on the flange of the nose cone.


Saturday, October 28, 2006

Prop and Nose Pant - 0.5 hours (457.5 Total)

In preparation to doing another weight and balance (and having little to do until I get some more parts in on Monday), I temporarily installed my prop and nose wheel pant. Both were only finger tightened into place.

I also installed some trim onto the nose wheel.


Chute Bridle - 0.5 hours (457 Total)

The next thing I did today was wrap the main bridle of the parachute with a 3/8" plastic cable loom. This made the cable loom pretty small, profile wise, to limit the amount it obstructs my view out of the windshield.

The bridle will need to be secured to the aluminum tube it is resting on once I remove the windsheild's plastic coating. I will try some double sided tape but I may need to rivet some type of brackets or tabs to the aluminum tube to hold the bridle in place.


Push To Talk Button - 0.5 hours (456.5 Total)

The next thing I did today was install my push to talk (PTT) button.

This involved removing the control stick and drilling a hole in the base of it. I inserted a coiled cable similar to a telephone hand set cable but with a 2.5mm stereo connector into the hole with a rubber grommet. I soldered a momentary switch to the wires and installed it in to the cap that goes on the control stick.

Unfortunately, the coiled wire had very fine conductors which break very easily. In fact one of the wires broke during the process of installing the cap. During normal use, the wire shouldn't see much vibration relative to the stick and button so it shouldn't be a problem.

While testing, I went ahead and mounted my radio to the instrument panel with velcro. The adhesive on the velcro is not recommended for fabric but a test I had done showed it adheres well unless you pull it from an edge. I deliberately sized the velcro piece on the fabric to be larger than the portion on the radio. This should keep the velcro from being pulled from an edge.


Control Grips - 0 hours (456 Total)

The next thing I did today was install the grips onto the flap handle and control stick. This was very simple to do with a technique I learned from a bicycle mechanic. Use an air compressor to blow air inside the base of the grip as you slide it on. This will inflate the grip and allow it to easily slide onto the stick.

Jury Struts - 1 hour (456 Total)

The first thing I did today was install my jury struts.

The jury struts are designed to be held in place by a pin and cotter pin. This setup has been known to fail due to the vibration shearing off the cotter pin.

In attempting to make a vibration resistant mount I replaced the normal aluminum inserts with nylon inserts. I riveted the inserts into place and then used a stainless steel sheet metal screw with coarse threads to screw into the holes I drilled in the center of the nylon.


Friday, October 27, 2006

Weight and Balance, Preliminary - 1 hour (455 Total)

After installing the wings I did a preliminary weight and balance calculation of the plane. There are still several major things that need to be added to the plane such as: prop, wheel pants, jury struts, and door.

Left Wheel: 248 lbs
Right Wheel: 234 lbs
Tail: 27 lbs

Total: 509 lbs

Assuming 200 lbs of pilot and 54 lbs of fuel (9 gal), these values put the center of gravity at 107". Rans specs the plane to have a C.G. between 101"-110". The missing components should not effect the C.G. too much since the nose wheel pant and prop should balance each other out and the main wheel pants and jury struts are right over the C.G.


Connect Wings - 1 hour (455 Total)

With the help of a few friends, I installed my wings... again. During the installing process, I need to trim the upper portion of the windshield to allow the leading edge of the wing to fit. This took several iterations of placing the wing close to it's mounting position, marking the Lexan, and trimming with my Dremel tool. I used some plastic sheets to mask off the inside of the plane to try and keep the debris from falling inside.


Wednesday, October 25, 2006

Window - 2 hours (454 Total)

The last thing I did today was install the window.

I fitted the window the same time I fitted the windshield so some of the photos below show the windshield prior to riveting.

The window former (aluminum tube) needed to be fitted at the same time as the window.

The window installation was pretty straight forward but I did have an issue with some of my rivet holes not lining up with one of the aluminum tubes. Because the protective plastic on this sheet of Lexan was opaque, I wasn't able to see that the predrilled holes in the sheet metal side panels were too high on the tubing. The second photo from the bottom shows how two of the holes elongated. I had drilled these two holes without knowing there was a problem. While drilling the third hole, I could feel the drill bit slip. This caused some severe marring of the aluminum tube. There isn't anything I can do about the marring but I was able to use some extra long rivets on the first two holes. The normal rivets would not have secured properly in the elongated holes.

The last photo shows the gusset placed on the window former. This was installed after the window was riveted in to place. The gusset on the other side (between the window and window former) was installed at the same time the window was fitted and installed.


Gascolator - 0 hours (452 Total)

Now that the windshield is in place, I can place the last two rivets that hold the gascolator mount in place.

Windshield Install - 3 hours (452 Total)

Prior to installing the windshield I needed to do a few more items of prep work.

The first thing was to trim the windshield. The Lexan material trims very easily by scoring with a utility knife and breaking. I needed to trim the windshield where it meets the lower half of the door and where it meets the top former on the left side of the plane. The trimmed edges required some sanding to soften the sharp edges.

I then cleaned and deburred the rivet holes in the Lexan and the plane. There were a few holes that still needed to drill out on the plane. These holes were where the windshield would be riveted into the steel frame. I needed to be extra careful when drilling these holes to keep from breaking drill bits.

The last step was loosening or removing the windshield's protective plastic cover where it would be connected to the plane. The most difficult area was where the windshield connected to the aluminum tube that runs down the left of the instrument pod. I needed to tear the protective coating away by hand. I tried gently scoring the plastic coating with a utility knife but no matter how soft I pressed, it would always scratch the Lexan.

After placing the windshield, I started the long process of riveting. The only challenging part of the riveting was where the windshield met the nose cone. I needed an extra set of hands to hold the backing washers in place while I riveted from the other side. I ended up using some fuel line that was intended to be used as primer line to hold the washers in place. I would stick the washer to the end of the primer line with double sided tape and then push the primer line onto the rivet. The primer line was just small enough to grip the end of the rivet, holding itself in place, while I pulled the rivet.


Fuse Labels and Chute Bridle - 0.5 hours (449 Total)

Before I install the windshield there are a couple of things I need to do while I still have easy access to the inside of the plane. The first is to update my fuse block labels. I will only have problems accessing the fuse block on the electrical panel but I went ahead and correct the instrument pod fuse block label at his time.


The next thing I need to do is route the parachute bridle. This needs to be routed between the windshield and any metal structure of the plane, most importantly, the leading edge mounting points of the wing. I also routed the smaller bridles that connect to the lower portion of the plane. I will need to carefully secure the bridles so they don't interfere with any of the control mechanisms.