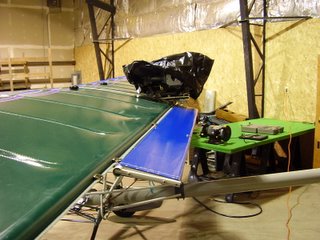
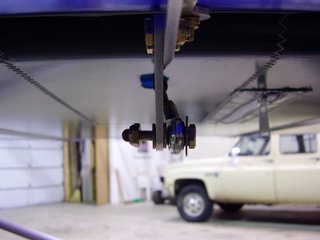
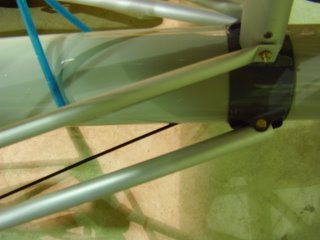
The second half of the day I worked on the hinges for the wings, ailerons, and flaps.
I started off by finding the locations of bolt holes for the hinges on the flaps. This was not easy considering the dark color of the fabric. Once I found the first hole by feeling for a dimple with my fingernail, I marked them with a pen. I was able to find the other holes a little easier by referring to the measurements I had made prior to putting the fabric on. Taking these measurements was very helpful since the manual doesn't give these dimensions. I did find one discrepency that I'll get into later.
Once the holes were marked, I marked out the 1.5" cutout in the velcro for the hinges. I used a pair of scissors to make the perpendicular cuts but found the soldering iron was best used to make the cuts parallel to the flaps. I used the soldering iron to weld any frayed fabric or loose thread.
I bolted the hinges onto the flaps without much trouble but needed to ream out the hinges with the #11 drill for the bolts to fit. This wasn't needed for the holes for the hinge bolt.
Next I assembled the flap's bracket for the teleflex cable. The instructions called for me to trim the bracket for the flaps but not the ailerons. This was done easily with my miter saw and bench grinder. I used a metal file to clean up the edges. The bolts and nuts used to hold the bracket pieces together are very close together. I could not use a socket wrench because of interference with the other bolts.
The instruction called for a spacer made from the 1/4" aluminum tubing to be placed inside the flaps at the trailing edge. I assume this is needed because the trailing edge of the flaps is made out of 1/2" aluminum tubing which would probably weaken if a bolt hole was drilled though it. I barely had enough of the 1/4" tubing to create the spacers for the flaps and ailerons. I needed to use a hack saw for the last few cuts because using my miter saw with its thick blade would have wasted too much material.
To insert the spacer inside the flaps, I just enlarged the hole I melted through the fabric for the bolt. This was not obvious to me at first.
The instructions called for the use of thin washers on the bolt that went through the spacer. I decided to use thick washers for this because when the acorn nut was put on, the end of the bolt partially broke through the acorn nut's plastic cap with the thin washers. Another solution would have been to increase the length of the spacer but I did not have any 1/4" tubing left over.


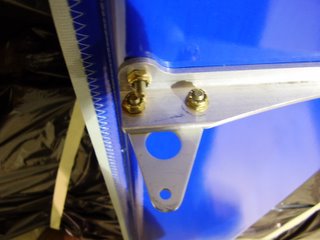
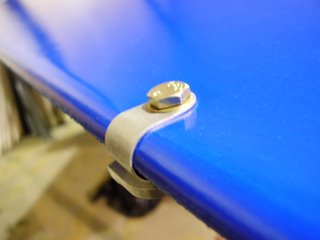
After finishing both flaps and repeating the process for the ailerons, I started attaching the hinges to the wings. The holes on the wings were just as hard to find as they were on the ailerons and flaps.
After cutting and cleaning up the 1.5" holes in the velcro for the fabric, I started bolting the hinges to the rear spar. I was shocked to find that the nut plate for the bolt that holds one of the flap hinges was not there. This was the case on the other wing as well. These are the hinges that sit closest to wing root. I remember double checking that the plates were installed prior to putting on the fabric. I examined some photos I have of the wing prior to putting the skin on and was able to see all seven nut plates. I believe what happened was that I installed the nut plate over the wrong hole. I vaguely remember there being one extra hold in the trailing edge spar. Because the manual didn't specify and I didn't have the flaps handy to compare to, I assumed that the spacing between the three hinges would be equal. Unfortunately, the hole that gave me a equal 30" from the center hinge to the two out hinges was incorrect.

Since I don't have access to the inside of the wing at this location, I don't have the ability to add the nut plate. My work around for this was to use a stainless steal rivet instead of the bolt. This will make replacing the hinge difficult which I have been told is something that needs to be done periodically because the hinge's bolt holes enlarge over time.

The next step was to use my soldering iron to cut the fabric from the wing's zippered access ports. This was straight forward and simple to do. Extra care was needed for the smaller access port because of the difficulty in holding the port open while using the soldering iron. The port only has room for one hand.
I then used the soldering iron to cut the opening in the wing for the left wing's teleflex cable used to actuate the flaps. The dimension in the manual were slightly off which required me to make a slightly larger hole. I then positioned the teleflex cable into the stop bracket inside the wing and safety wired it. I also removed the zip-tie that was holding the teleflex cable in position.
I then attached the left flap to the wing. I mistakenly placed the hinge bolts into the hinges without using a washer first. Removing the hinge bolts was not easy and scratched up the bolts. This shouldn't effect their strength but it's something to avoid doing in the future.
Once the left flap was fully attached, I loosely connected the teleflex cable and tested it's movement. It appears as if the bolt that connects the bracket to the teleflex cable is too long and will break through the acorn nut's plastic cap. I will replace the thin washers with the thicker washers to prevent this once I start fine tuning the flap position.
