Saturday, July 02, 2005

Tail Boom - 6 hours (127 Total)

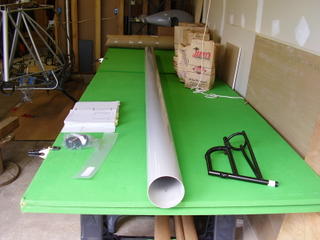
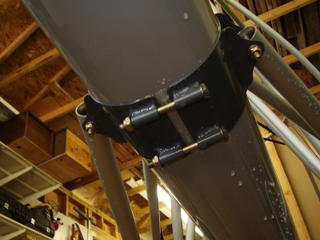
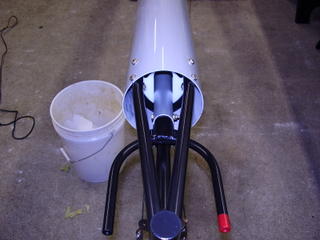
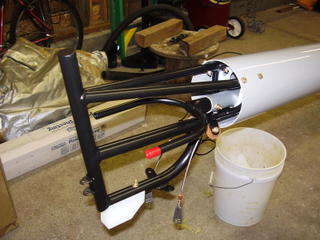
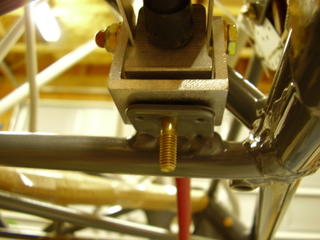
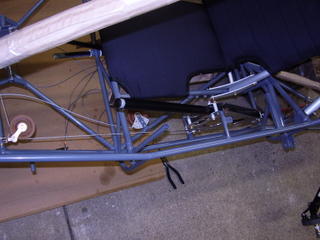
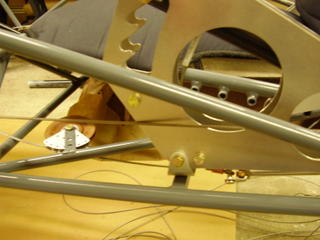
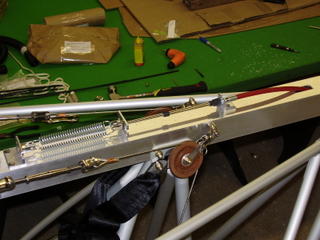
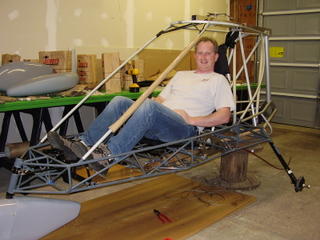
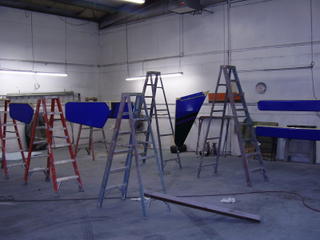
Today I installed the tail boom and related components. I started off by installing the four nut plates into the tail boom. I screwed up on one of the rivets and need to replace it with another 40APR1/8. I noticed some bubbles and chipping in the finish near the nut plate holes which I took some pictures of.

Prior to installing the tail boom, I verified that it had a reinforced layer on the inside. The reinforcement started at 33 13/16 inches from the front and ended 61 7//8 inches from the end.

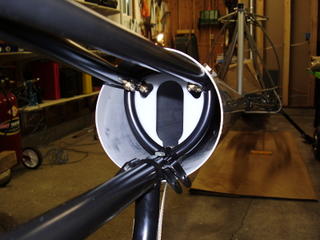
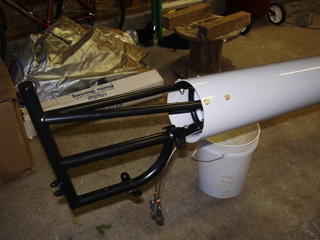
I installed the tail boom into the chassis with the recommended Vaseline. This worked very well but cleaning the Vaseline off took a significant amount of work. I used gasoline and paper towels to wipe off the majority then washed the tail boom with dish soap and water. Rans told me afterward that 409 works well for cleaning off the Vaseline.

I did not glue the lexan strip that is used in the tail boom bracket. I used a piece of wood to pry the bracket apart so I had room to install the lexan strip after the tail boom was installed.

My kit did not come with the (2) AN4-27A bolts that are suppose to be used in the tail boom bracket. I assume I didn't receive enough (2) AN365-428A nuts or (4) A960-416L washers either. As a temporary bolt, I used the ALP (painted head) bolts that were too long for the wing.

I then level the chassis which was difficult to do since my seat bottom cushion was installed. The manual recommends putting a level across the seat truss to level the chassis. After leveling, I found the bottom of the tail boon and drilled three holes for the tail boom extension and horizontal stabilizer cable tangs.

I then installed the tail boom extension. The elevator push pull tube guide needed significant modification to allow the inner nuts to be accessed with a wrench. I also installed the rudder pulleys and skid block.

I ended up removing and reinstalling the tail boom extension at least three times for different reasons. The last reason was to install the larger elevator push pull tube. The manual isn't clear about when to install this and how. It also doesn't mention where on the push pull tube the foam rubber insulator is suppose to go. I placed it in the middle of the tube.

Lastly, I installed the elevator horn and connected the large elevator push pull tube to the 5/8 inch elevator push pull tube that's connected to the control stick. I noticed that the large elevator push pull tube is double re-enforced on the front end but not re-enforced on the back end.



Friday, July 01, 2005

Flaps Mechanism - 2 hours (121 Total)

Today I installed the flap system. Unfortunately I ran into problems. The AN3-10A bolt that came with the flap actuator arm is too long; the not threaded portion of the bolt sticks through the hole in the frame. I replaced the bolt with a AN3-5A. I'll need a replacement for the AN3-5A.

After bolting the flap actuator into place, I noticed that the aileron cable rubs on the actuator housing.

I assembled the teleflex end of the flap actuator system on top of the keel tube. It went together without too much effort but the springs took some wrestling with before they'd go onto the shackles. I need to bottom out the standard nut onto the teleflex rod to give me leverage to tighten the nylon lock nut which bolts onto the end of the teleflex rod.


Thursday, June 30, 2005

Seat - 3.5 hours (119 Total)

I installed the seat today. It went together relatively easily but I did have some trouble with the rivet nuts which go into the seatback and hold the headrest in place. The important thing with the rivet nut is to make sure you have a long enough bolt, not screw, and a washer. It also helped to install the bolt into the rivet prior to slipping the rivet into the hole. I was lucky to have a bolt that had a smaller head than the nut. This allowed me to use a box wrench on both the nut and bolt head.

I needed to grind down the edge of the seat support flute tube so it would rotate in the hinge riveted to the seat back. I used my Dremel for this and to grind down the bottoms of the seat back frame so the frame could lean back fully.

I was able to sit in the seat for the first time! It was quite comfy.

The main reason I'm working on the seat now is because I noticed that the flap handle mechanism doesn't have mounting holes pre-drilled for the trim wheel mechanism. More importantly the flap mechanism doesn't resemble the drawings for the trim instructions. When I asked Rans about this they suggested that I install the seat and find a comfortable position to mount the trim wheel on to the flap assembly.


Wednesday, June 29, 2005

Seat - 0.5 hours (115.5 Total)

I started working on the seat today. I bolted the gussets to the seat back frame.

Tuesday, June 28, 2005

Floorboard - 1.5 hours (115 Total)

Today I installed the floorboard. I also installed the front four pulleys and cable for the rudder control mechanism.

Wednesday, June 22, 2005

Control Stick - 4 Hours (113.5 Total)

Today was a productive day. I installed the control stick and related components. I started by installing the control stick which went together easily. I oiled the control stick pivot points which are welded to the frame with cutting fluid by accident but it seems to work well. I then installed the elevator push/pull tube. I spend a lot of time grinding the slide points that are welded to the frame with my dremel. The little drum sander worked very well for this. I also installed the control tee, pulleys, and aileron cable. The U-brackets used in the pulleys don't rotate because the bolt heads and nuts are binding up within the brackets. This probably isn't an issue.

Tuesday, June 21, 2005

Wheel Pant - 2 Hours (109.5 Total)

Today was another bad day. I cut and drilled holes for the left main wheel pant. Unfortunately, the 4" distance Rans Recommended wasn't enough to allow the wheel to clear the pant. I will need a new pant.

I added the spacers between the brake drum and wheel. The axle is too short to work with the wheel pant adapter. I have several questions that I need to ask Rans.

Thursday, June 16, 2005

Nose Pant and Rudder Peddles - 3.5 Hours (107.5 Total)

Today I attached the nose wheel pant. The pant came with the bottom hole for the tire pre-cut but I needed to take off quite a bit from the front for the tire to fit.

I also installed the rudder peddles. This took significantly longer than I expected. I spent a lot of time trying to remove one of the bushings that became stuck. I ended up having to fabricate a new bushing out of scrap. I also had to sand the powder coating off the rudder peddle ends and the inside of the fittings welded onto the cage. The powder coating was too think and prevented the parts from mating.

I also attached the steering linkage arms.

Wednesday, June 15, 2005

Gear Legs - 3 Hours (104 Total)

Today I installed the main gear axles. I also had Bill Wood tap the nose wheel axle. Unfortunately, he taped it with a 10-24 instead of the recommended 10-32. I also started working on the nose wheel pant by drilling bolt holes and cutting out a hole for the fork.

I also sanded the axle down so it would fin into the nose wheel bearings. I also cut the axle bushings since the ones they sent me were for the tundra tires.

Tuesday, June 14, 2005

Nose Fork - 1 Hours (101 Total)

Today I fixed things. The nose gear was sticking too much so I enlarged the hole that holds the horn in place thinking that the friction was between the horn and that chassis tube. This didn't help but I discovered that if I loosen the bolt, the fork rotates smoothly. Tightening the bolt causes the nose gear for to warp.

I also drilled new holes in the right brake to correct it's orientation. I then attached the left brake.


Monday, June 13, 2005

Gear Legs - 3 Hours (100 Total)

It looks like the problem I was having drilling the 1/4 inch holes was caused by me pre-drilling the holes with smaller drill bits. By pre-drilling with a bit only slightly smaller bit, the 1/4 inch bit didn't have enough material to bite into. I had no problem using a fresh bit when I used a 1/8" pilot hole.

I assembled the main gear legs and axle sockets. I also installed the nose gear fork and horn. I also installed the right brake assembly.
Clear Coat - 0 Hours (Total 97)

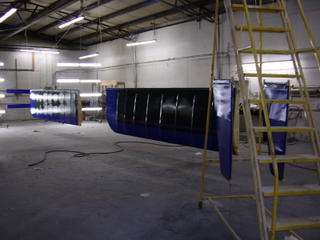
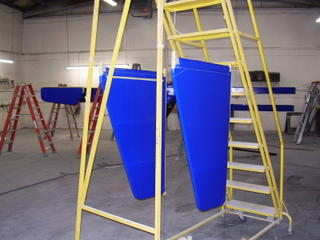
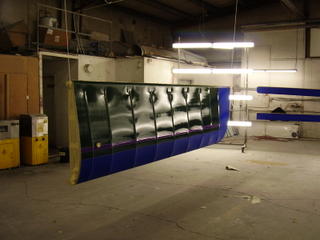
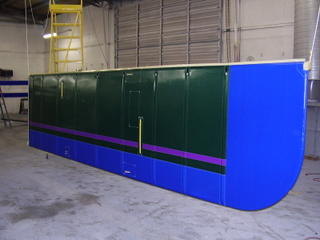
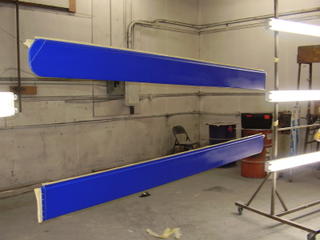
Here are some pictures of the clear coat being applied to the wings and tail surfaces.


Sunday, June 12, 2005

Gear Legs - 1 Hours (97 Total)

Today I bought new drill bits. Unfortunately, I still can't drill through the main gear legs. I forced the bit to drill though the chassis end of the gear legs but I still need to drill though the axle socket end.

Saturday, June 11, 2005

Brakes (more) - 2.5 Hours (96 Total)

Today I spent a little more time on the brakes. I drilled a hole in one of the brake shoes for the lower spring to use. This made both brakes actuate with approximately the same force. I also assembled all three wheels and started working on the main gear legs. Unfortunately, my 1/4 inch drill bit is too dull to drill through the gear legs. Lastly, I installed the stopper bolts for the rudder peddles.


Friday, June 10, 2005

Wing Transport - 0 Hours (Total 93.5)

With the help of a few friends I loaded the wings onto the transport brackets I made and loaded them into my truck.

I arranged to have them clear coated at an RV paint shop.


Thursday, June 09, 2005

Brakes - 1.5 Hours (93.5 Total)

Today I put together the brake assemblies. I spent most of the time rounding the edges of the brake pads and other parts. I drilled extra holes to allow the springs to stretch farther but I couldn't get the spring tabs into the new holes because the spring didn't have long enough ends. I ended up leaving one set of pads as is. The other has the upper spring (near the pivot) in two new holes. The lower spring used one new hole.

Sunday, June 05, 2005

More Skinning Right Wing - 6.5 Hours (92 Total)

Today I attached the fabric to the right wing's root rib. I proceeded to tighten the fabric and install the ribs. Since I am still waiting on a plastic rib heel, I left out a center rib set. I had problems with getting the top rib, closest to the tip, installed. I tried trimming the plastic tip but it didn't seem to help. I ended up trimming 1/8 inch off the rib. This allowed the rib to install but required considerable force.

I then cut exit holes for the two strut plates, jury strut bracket, and fuel tank filler. I then used a hot air gun and iron to work out all of the wrinkles. I was able to get all the wrinkles out of the tip. I used a soldering iron to clean up any frayed fabric edges and thread ends.

Saturday, June 04, 2005

Skinning Right Wing - 3 Hours (85.5 Total)

Today Randy came over and helped me slide the skin on to the right wing. I attached the skin to the root rib and tightened the skin. I started installing the ribs but noticed that the velcro seam on trailing edge was not centered very well. It was within the 1/2 inch that the manual states but I noticed that the fabric at the tip had severe wrinkles. I assumed that I could minimize the wrinkles if the skin was centered. I disconnected the skin from the root rib and slid the skin off a couple of inches. I then slowly worked the fabric until the seam was centered on the trailing edge spar. I brought the fabric back up, flush with the root rib. The wrinkle did not go away, in fact it was worse. We'll see what it looks like when I tighten the root rib and install the other ribs.

Monday, May 30, 2005

Prepping Right Wing - 3.5 Hours (82.5 Total)

Today I prepped the right wing for skinning. This included: installing select fuel lines, drilling holes in the root rib, installing the flap teleflex cable, and taping over the bolt heads. I also taped the tension cable. I also assembled the ribs. I started skinning the wing and got as far as I could without help.

Sunday, May 29, 2005

Heat Shrink Left Wing - 7.5 Hours (79 Total)

Today I started ironing out the wrinkles on the left wing. Unfortunately, the green fabric changes color when ironed. This wasn't a big problem but required me to iron the entire fabric instead of just spot ironing like I had done earlier.

I installed the top and bottom ribs without too much problem. I quickly learned that extra finesse is needed to make sure the ribs are inserted in the pockets. I did break one of the plastic heals. The piece is still inside the wing. I'll need to order a new one since I don't have any extras. The top rib was very difficult to fully insert. I don't know what caused this or what allowed it to fully insert. I ended up playing with it for ~25 minutes.

I used my soldering iron to cut exit holes for the two strut plates, jury strut bracket, and fuel tank filler.

I used the hot air gun and iron to remove any remaining wrinkles. For the most part, the fabric is nice and taunt. The exception is the wing tip. I was able to get most of the slack out but the last few wrinkles wont come out. I ended up melting some of the fabric with the hot air gun. Luckily the fabric is reinforced with multiple layers in that location.