Final Post
Well I was originally planning to continue making posts to share the results of my flight tests but I've come to the conclusion that I'm just too lazy. I'm having a hard time motivating myself to update this blog when I could be out flying! It's just too time consuming to update my own testing documents and then update this website. Unfortunately, the Blogger website does not allow any files to be uploaded except images. I tried using a third party file hosting site in my last post but that only worked for a short period of time before the file was deleted. I also tried importing the files into Google Documents but there were too many headaches and bugs.
If you are really interested in my performance and testing data, send me an email and I'll email you my documents.
So far I have flown my S-14 eleven times. The last ten times were done ten days in a row! I still have a lot of testing to perform but so far the plane, engine, and instruments are working great.
I will continue to update this blog with back dated posts and photos. I've made a promise to myself that I won't start any other projects until the blog is complete.
It took me 500 hours to build my S-14 and another 1000 hours doing research. All of this within two years. Building my S-14 is probably my greatest accomplishment to date. I wouldn't say I enjoyed every minute of it but it was definitely a rewarding project.
What will I build next...
Sunday, May 13, 2007
First Flight Test Results
First Flight Test Results
Instead of rewriting the results of my flight test, I have uploaded my flight test plan which is written in MS-Word. I added the results of the flight and post inspection items to the document.
The link below will allow you to download the document. The file is hosted by a third party website which requires you to read their ads for 55 seconds prior to downloading the file. On the bottom right of the web page you will see the countdown timer.
First Flight Test Plan
Below are some photos of the squaks.


Instead of rewriting the results of my flight test, I have uploaded my flight test plan which is written in MS-Word. I added the results of the flight and post inspection items to the document.
The link below will allow you to download the document. The file is hosted by a third party website which requires you to read their ads for 55 seconds prior to downloading the file. On the bottom right of the web page you will see the countdown timer.
First Flight Test Plan
Below are some photos of the squaks.


Sunday, May 06, 2007
Taxi Tests
I performed several taxi tests to verify performance of engine, prop, brakes, steering, cooling, and control surfaces. All items performed as expected. I did find several items that needed attention after my post "taxi" inspection.
A piece of foam came loose from my battery installation. I replaced it and re-tightened the battery strap.
The right brake cable is sticking slightly. I adjusted the cable and removed slack.
A pin hole leak in my exhaust system. A small amount of carbon is building up around the hole. I will need to watch it. Hopefully it will plug itself.


I performed several taxi tests to verify performance of engine, prop, brakes, steering, cooling, and control surfaces. All items performed as expected. I did find several items that needed attention after my post "taxi" inspection.
A piece of foam came loose from my battery installation. I replaced it and re-tightened the battery strap.
The right brake cable is sticking slightly. I adjusted the cable and removed slack.
A pin hole leak in my exhaust system. A small amount of carbon is building up around the hole. I will need to watch it. Hopefully it will plug itself.


Friday, April 06, 2007
Airworthiness Inspection - 2.0 hours (500 Total)
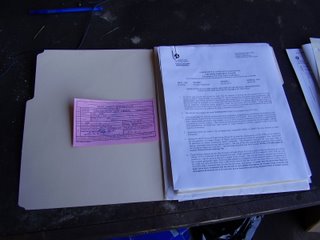
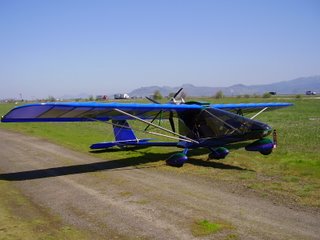
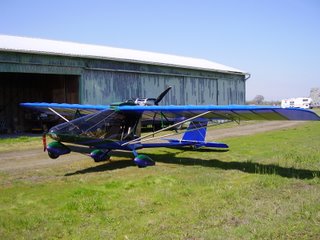
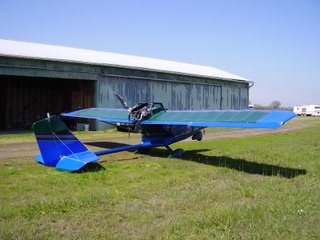
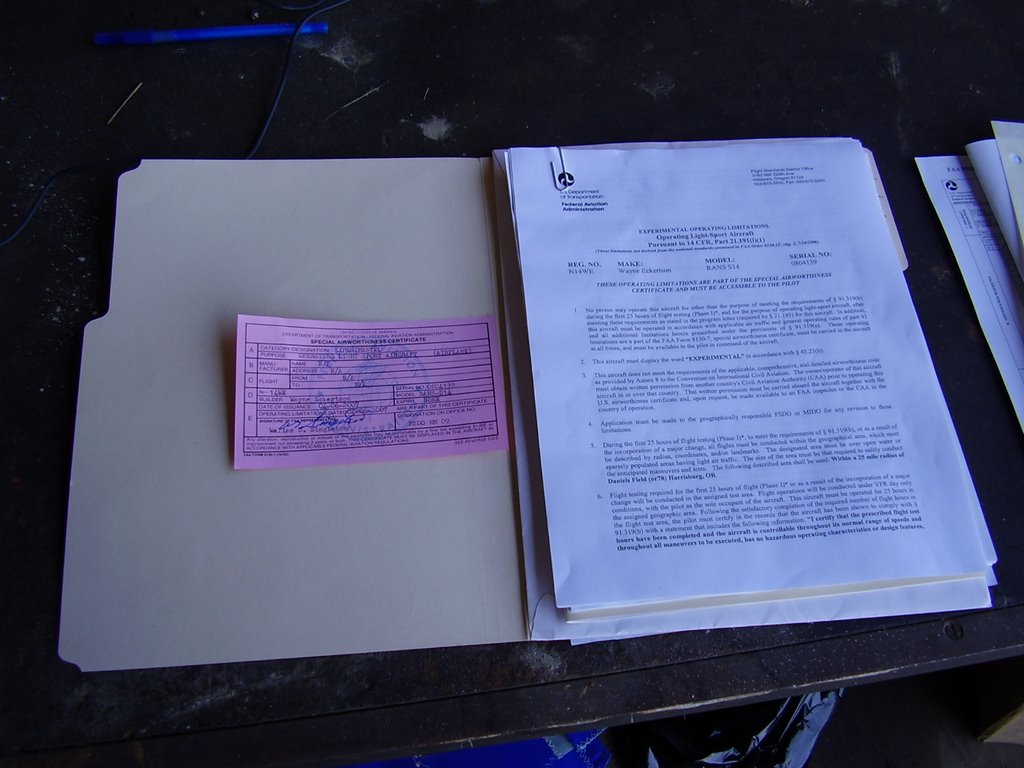
Today I passed my airworthiness inspection!
Dean Singleton from the Portland, OR (Hillsboro) FSDO came down to do the inspection. The inspection took approximately two hours.
The inspection was not as thorough as I had expected. In fact, the inspector failed to notice six nuts that I had not tightened down on the back side of my prop bolts! He also did not ask to see my pilot operating handbook.
Early on, the inspector seemed to be looking at things very closely but then started making comments about how impressed he was with the detail I had put into the construction. After that he seemed to be less thorough. I belive that if he would have found something wrong early on, he would have continued a thorough inspection of the entire plane.
Today I passed my airworthiness inspection!
Dean Singleton from the Portland, OR (Hillsboro) FSDO came down to do the inspection. The inspection took approximately two hours.
The inspection was not as thorough as I had expected. In fact, the inspector failed to notice six nuts that I had not tightened down on the back side of my prop bolts! He also did not ask to see my pilot operating handbook.
Early on, the inspector seemed to be looking at things very closely but then started making comments about how impressed he was with the detail I had put into the construction. After that he seemed to be less thorough. I belive that if he would have found something wrong early on, he would have continued a thorough inspection of the entire plane.


Sunday, March 11, 2007
Rudder Cables and Fuel Tanks - 1.0 hour (498 Total)
After talking with Rans about cable tensions I decided to tighten my rudder cables. My rudder cables had a significant amount of slack in them. To tighten them I loosened the three bolts that hold the rudder horns to the rudder. This allowed the horns to rotate towards the front of the plane. I then removed as much slack as I could from the cables. Tightening the bolts rotated the horn back into place and removed additional slack.


I also filled my fuel tanks for the first time. While doing so, I determined that the tanks have very little unusable fuel, only a few ounces. I also discovered that my fuel tanks hold significantly less than the 9 gallons they are suppose to. My left tank holds 8 gallons and my right tank holds 7 gallons. The right tank holds less fuel because it is slightly deformed. While I was building the right wing, I left the wing overnight while it was resting upside down. This put the weight of the wing on the filler spout of the tank. The next morning the top of the tank had compressed. I tried several methods of reforming the tank without success.
While filling the tanks, I marked the sight tubes after each gallon. Unfortunately, the smallest amount of fuel I can see is 3 gallons.

After talking with Rans about cable tensions I decided to tighten my rudder cables. My rudder cables had a significant amount of slack in them. To tighten them I loosened the three bolts that hold the rudder horns to the rudder. This allowed the horns to rotate towards the front of the plane. I then removed as much slack as I could from the cables. Tightening the bolts rotated the horn back into place and removed additional slack.


I also filled my fuel tanks for the first time. While doing so, I determined that the tanks have very little unusable fuel, only a few ounces. I also discovered that my fuel tanks hold significantly less than the 9 gallons they are suppose to. My left tank holds 8 gallons and my right tank holds 7 gallons. The right tank holds less fuel because it is slightly deformed. While I was building the right wing, I left the wing overnight while it was resting upside down. This put the weight of the wing on the filler spout of the tank. The next morning the top of the tank had compressed. I tried several methods of reforming the tank without success.
While filling the tanks, I marked the sight tubes after each gallon. Unfortunately, the smallest amount of fuel I can see is 3 gallons.

Saturday, March 10, 2007
Weight and Balance - 1.0 hour (497 Total)
With my airworthiness inspection right around the corner, it is time to do my final weight and balance.
The bathroom scales I purchase are not the most accurate so I took three different measurements. Each time I rotated the scales to a different position effectively giving me three different measurements for each position. This didn't seam to help my tail measurement; I measure 22#, 30#, and 38#. (At a latter date I verified my tail weight at 29.5# with a shipping scale I borrowed from my office.)
My empty weight came out to 556.5#. This is 146.5# more than the 410# Rans specs for the S-14 with a Rotax 582 engine. Some of the items that gave me my extra weight include: HKS engine, BRS parachute, battery, clear coated wings and tail, extra instruments, fabric interior, door shock, trim tab, wheel pants, jury strut fairings, strobe, gascolator, electric fuel pumps, adjustable lift struts, second fuel tank, and beefed up electrical system.
My CG turned out to be at 107". The CG range for the plane is 101" to 110".
After completing the weight and balance, I did a thorough inspection of the entire plane.


With my airworthiness inspection right around the corner, it is time to do my final weight and balance.
The bathroom scales I purchase are not the most accurate so I took three different measurements. Each time I rotated the scales to a different position effectively giving me three different measurements for each position. This didn't seam to help my tail measurement; I measure 22#, 30#, and 38#. (At a latter date I verified my tail weight at 29.5# with a shipping scale I borrowed from my office.)
My empty weight came out to 556.5#. This is 146.5# more than the 410# Rans specs for the S-14 with a Rotax 582 engine. Some of the items that gave me my extra weight include: HKS engine, BRS parachute, battery, clear coated wings and tail, extra instruments, fabric interior, door shock, trim tab, wheel pants, jury strut fairings, strobe, gascolator, electric fuel pumps, adjustable lift struts, second fuel tank, and beefed up electrical system.
My CG turned out to be at 107". The CG range for the plane is 101" to 110".
After completing the weight and balance, I did a thorough inspection of the entire plane.


Saturday, January 13, 2007
Carb Balancing - 2.0 hours (496 Total)
I spent many hours balancing my carbs (but I'm only counting two). This was a new experience for me since I have never worked on carburetors before. I was able to remove my prop during the balancing which made it a lot easier and safer. I also was able to borrow a set of vacuum gauges which also made the job easier.
Once I had reattached my prop, I set the pitch to a static RPM of 5600.
I spent many hours balancing my carbs (but I'm only counting two). This was a new experience for me since I have never worked on carburetors before. I was able to remove my prop during the balancing which made it a lot easier and safer. I also was able to borrow a set of vacuum gauges which also made the job easier.
Once I had reattached my prop, I set the pitch to a static RPM of 5600.
Wednesday, January 10, 2007
Labels - 1.0 hour (494 Total)
While taking the 16-hour course to get my inspection rating for my E-LSA, I learned that I had made a couple of mistakes on my airplane.
The first mistake was that I put Rans down as the builder of my airplane. I had done this on my application for airworthness certificate and on the serial number plate I installed onto my plane. The FAA confirmed this and had me resubmit some of my paperwork.
The hard part was getting a new serial number plate, engraving it, rolling it, and then replacing the old one.

I also learned how a trim tab works and how the airflow over it effects control surfaces. This meant that I needed to replace the sticker I placed on trim tab wheel. Luckily I hadn't thrown out the other sticker Rans provided.

While taking the 16-hour course to get my inspection rating for my E-LSA, I learned that I had made a couple of mistakes on my airplane.
The first mistake was that I put Rans down as the builder of my airplane. I had done this on my application for airworthness certificate and on the serial number plate I installed onto my plane. The FAA confirmed this and had me resubmit some of my paperwork.
The hard part was getting a new serial number plate, engraving it, rolling it, and then replacing the old one.

I also learned how a trim tab works and how the airflow over it effects control surfaces. This meant that I needed to replace the sticker I placed on trim tab wheel. Luckily I hadn't thrown out the other sticker Rans provided.

Sunday, December 17, 2006
Door Strut - 4.0 hours (493 Total)
Today I installed a lift strut for my door. This was an addition above and beyond the Rans kit. I purchased a 15lbs lift strut for the job. I tried using a 10lbs lift strut but it wasn't strong enough. Keep in mind the strength required depends on the geometry of the mounting points.
I used some left over gussets from the door frame to make brackets to hold the lift strut ends. I trimmed and drilled the gussets to to the required shapes.
I had pre-drilled holes in the door frame and window frame for the brackets prior to installing the Lexan. Unfortunately, I did not drill the holes very precisely so I had trouble lining them up with the holes in the brackets. (Getting a full size drill behind the Lexan was almost impossible)
The brackets on the door end needed to be slightly bent to allow the bolt to clear the door frame.
The lift strut for the door works great!


Today I installed a lift strut for my door. This was an addition above and beyond the Rans kit. I purchased a 15lbs lift strut for the job. I tried using a 10lbs lift strut but it wasn't strong enough. Keep in mind the strength required depends on the geometry of the mounting points.
I used some left over gussets from the door frame to make brackets to hold the lift strut ends. I trimmed and drilled the gussets to to the required shapes.
I had pre-drilled holes in the door frame and window frame for the brackets prior to installing the Lexan. Unfortunately, I did not drill the holes very precisely so I had trouble lining them up with the holes in the brackets. (Getting a full size drill behind the Lexan was almost impossible)
The brackets on the door end needed to be slightly bent to allow the bolt to clear the door frame.
The lift strut for the door works great!


Saturday, December 16, 2006
Parachute Rigging - 3.0 hours (489 Total)
Today I installed my oil cooler cowl and routed my parachute rigging.
Prior to installing the oil cooler cowl, I attached the adhesive foam rubber to the bottom of the cowl to protect the wing fabric. I then bolted the cowl down using long bolts. I then replaced the bolts, one at a time, with shorter ones to further compress the foam rubber. I did this a second time with the final bolts. This gave me a snug fitting cowl.
I then routed the parachute rigging between the cowl brackets and the cowl. This included two straps down to the steal tub, a short strap wrapped around the root tube (square beam), the strap that connects to the parachute, and a quick link to connect them all together. I used several wire-ties to secure the straps to the root tube and the cowl brackets. This is necessary to prevent the straps from interfering with the aileron cables and pulleys.
I used some Goop brand adhesive to glue the parachute strap along the aluminum tube that runs along the left side of the windshield.


Today I installed my oil cooler cowl and routed my parachute rigging.
Prior to installing the oil cooler cowl, I attached the adhesive foam rubber to the bottom of the cowl to protect the wing fabric. I then bolted the cowl down using long bolts. I then replaced the bolts, one at a time, with shorter ones to further compress the foam rubber. I did this a second time with the final bolts. This gave me a snug fitting cowl.
I then routed the parachute rigging between the cowl brackets and the cowl. This included two straps down to the steal tub, a short strap wrapped around the root tube (square beam), the strap that connects to the parachute, and a quick link to connect them all together. I used several wire-ties to secure the straps to the root tube and the cowl brackets. This is necessary to prevent the straps from interfering with the aileron cables and pulleys.
I used some Goop brand adhesive to glue the parachute strap along the aluminum tube that runs along the left side of the windshield.


Sunday, December 10, 2006
Reattach Wings - 4.0 hours (486 Total)
With the help of a couple of friends I reattached the wings to the airplane. This is the third time the wings have been installed onto the plane and I was hoping it would be a little easier. Attaching the lift struts was a little easier since I have learned the technique for installing them. Unfortunately, connecting the leading edge of the right wing became very difficult.
When I installed the window, I forced the window former (aluminum tube) into place. This lifted up the curved tube that the top of the window connects to. Which then caused the leading edge of the right wing to misalign with the wing bracket. I was still able to install the wing but it took a great amount of effort to get the bolt holes to align. I should have trimmed the window former prior to installing it.
I replaced several of the wing bolts that have been worn from the installing and removing process. The last photo shows the eye bolt I installed into the leading edge lift strut. This will hopefully give me a good tie down point.
While installing the wings, I did damage the right carb heat probe. I'll need to replace it.
Just prior to installing the wings, actually in the middle of it, I installed some rubber and foam trim.


With the help of a couple of friends I reattached the wings to the airplane. This is the third time the wings have been installed onto the plane and I was hoping it would be a little easier. Attaching the lift struts was a little easier since I have learned the technique for installing them. Unfortunately, connecting the leading edge of the right wing became very difficult.
When I installed the window, I forced the window former (aluminum tube) into place. This lifted up the curved tube that the top of the window connects to. Which then caused the leading edge of the right wing to misalign with the wing bracket. I was still able to install the wing but it took a great amount of effort to get the bolt holes to align. I should have trimmed the window former prior to installing it.
I replaced several of the wing bolts that have been worn from the installing and removing process. The last photo shows the eye bolt I installed into the leading edge lift strut. This will hopefully give me a good tie down point.
While installing the wings, I did damage the right carb heat probe. I'll need to replace it.
Just prior to installing the wings, actually in the middle of it, I installed some rubber and foam trim.


Wednesday, December 06, 2006
Moving Day - 0.0 hours (482 Total)
Today I moved my plane from my workshop to my hanger. My hanger is located at Daniels Field, Harrisburg Oregon (OR78).
I hired a professional moving company to move the plane for me. The move went very well and no "hanger rash" occurred. I did need to fold up one of the horizontal stabilizers to allow the plane to fit into the truck. The move cost $250.


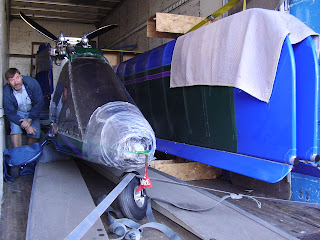

Today I moved my plane from my workshop to my hanger. My hanger is located at Daniels Field, Harrisburg Oregon (OR78).
I hired a professional moving company to move the plane for me. The move went very well and no "hanger rash" occurred. I did need to fold up one of the horizontal stabilizers to allow the plane to fit into the truck. The move cost $250.


Saturday, November 18, 2006
Instrument Panel - 0.5 hours (482 Total)
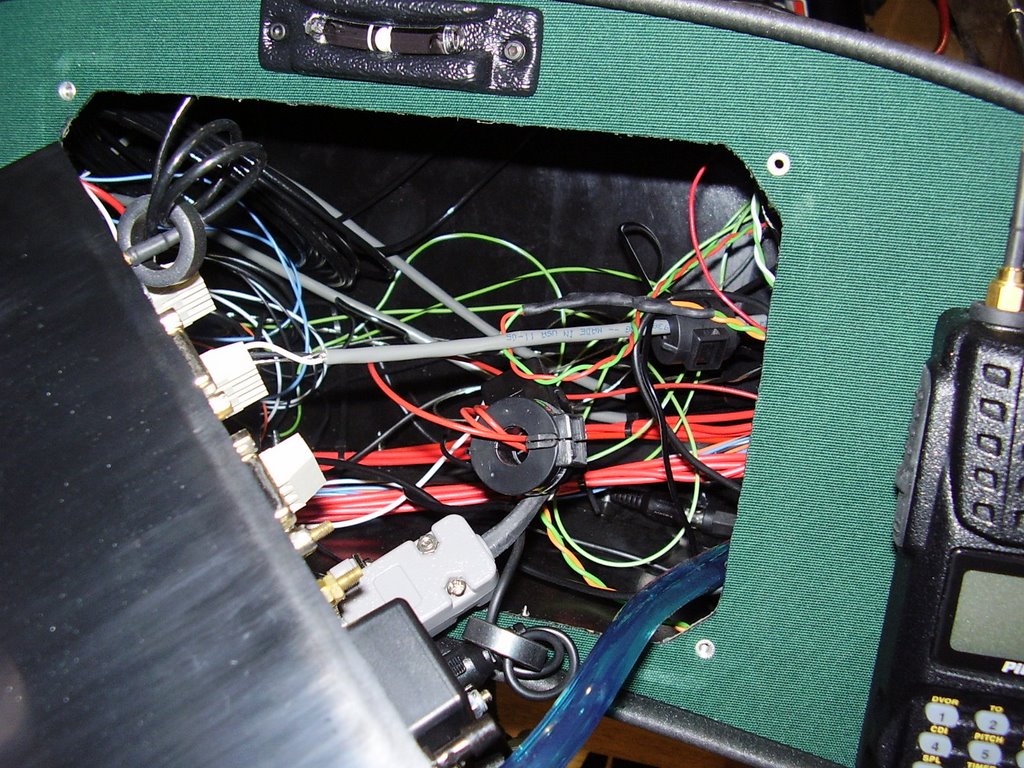
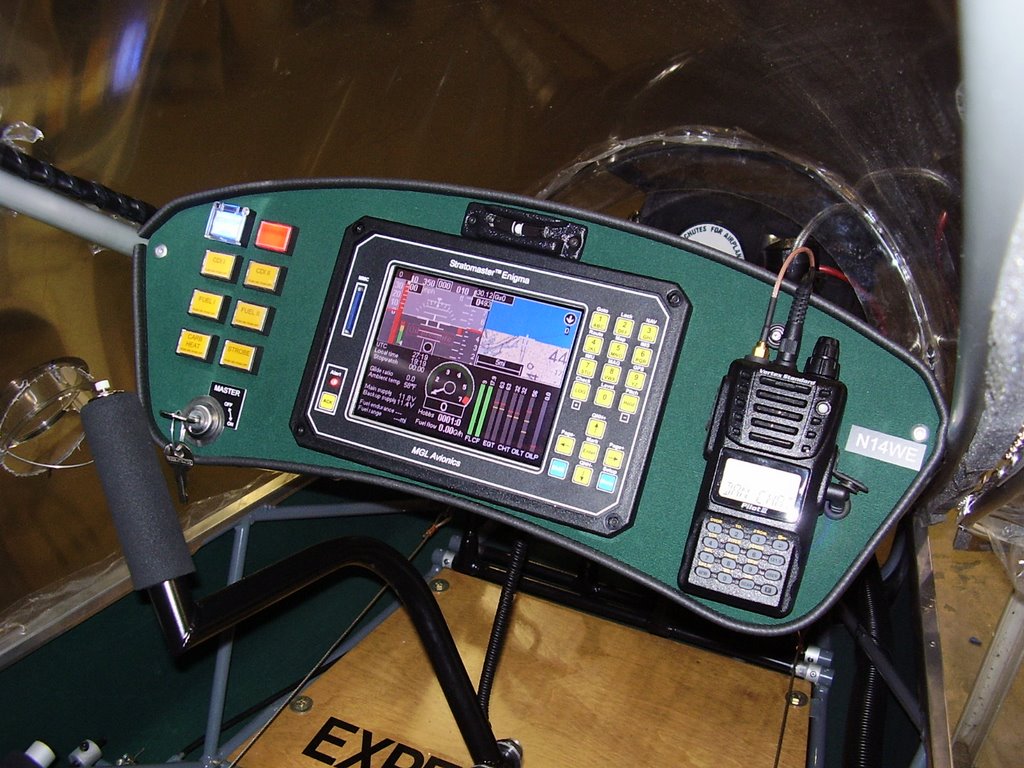
The last thing I needed to do today was install my ferrite ring EMI filters to the Enigma. I was getting a significant amount of noise on my radio when the Enigma was turned on. I would need to set my squelch to the highest setting of 8 to block out the noise. With the Enigma turned off, I only need a squelch level of 3. After experimenting with several types of ferrite beads I was able to get the noise down to where I could set my squelch to 5 or 6.
In the photo below you can see the four of the five ferrite rings I installed. The round one in the center is hiding a fifth ring.
I then bolted the Enigma in place using some Locktite.
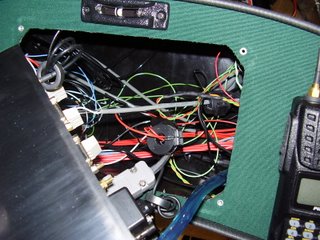
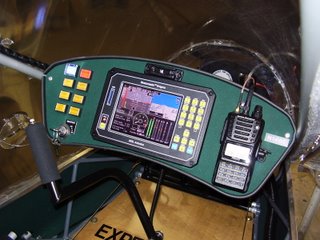
The last thing I needed to do today was install my ferrite ring EMI filters to the Enigma. I was getting a significant amount of noise on my radio when the Enigma was turned on. I would need to set my squelch to the highest setting of 8 to block out the noise. With the Enigma turned off, I only need a squelch level of 3. After experimenting with several types of ferrite beads I was able to get the noise down to where I could set my squelch to 5 or 6.
In the photo below you can see the four of the five ferrite rings I installed. The round one in the center is hiding a fifth ring.
I then bolted the Enigma in place using some Locktite.
Subscribe to:
Posts (Atom)